[TUTORIAL]
A step-by-step guide to creating and sharing your 3D models.
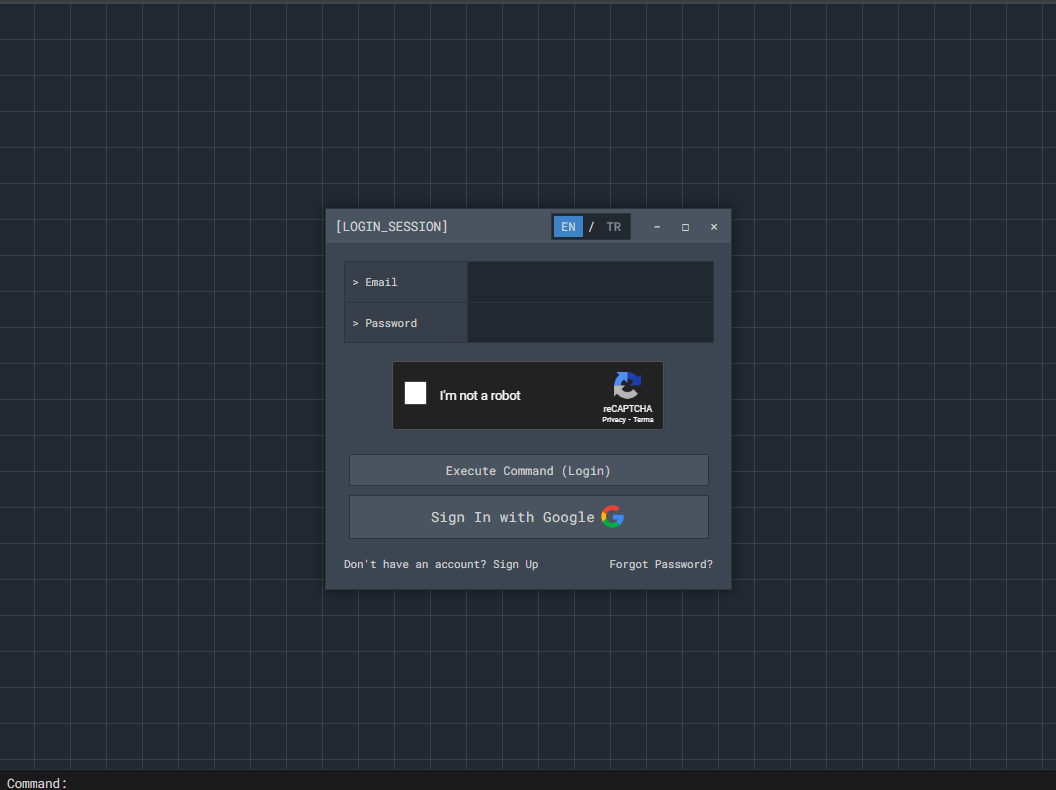
Step 1: Login to Your Account
To get started, log into the platform. You can use your Email/Password or sign in with your Google account. If you're new, click "Sign Up".
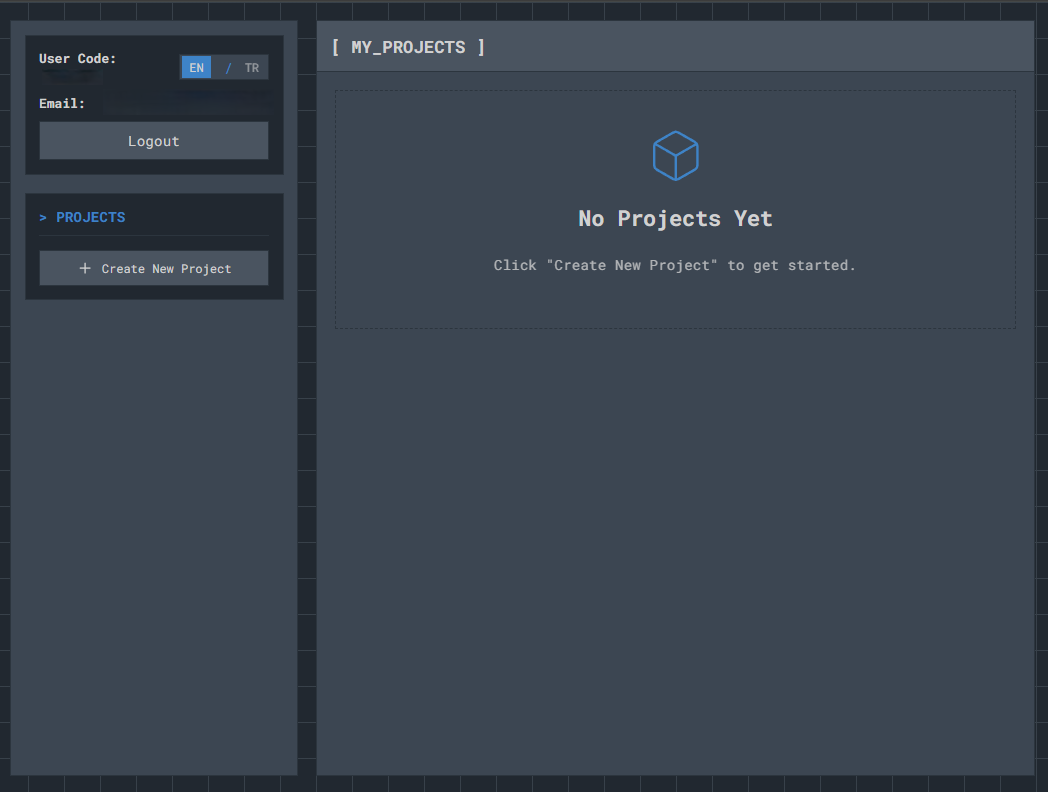
Step 2: Create a New Project
After logging in, you'll land on your [ MY_PROJECTS ] dashboard. Click the "+ Create New Project" button to begin.
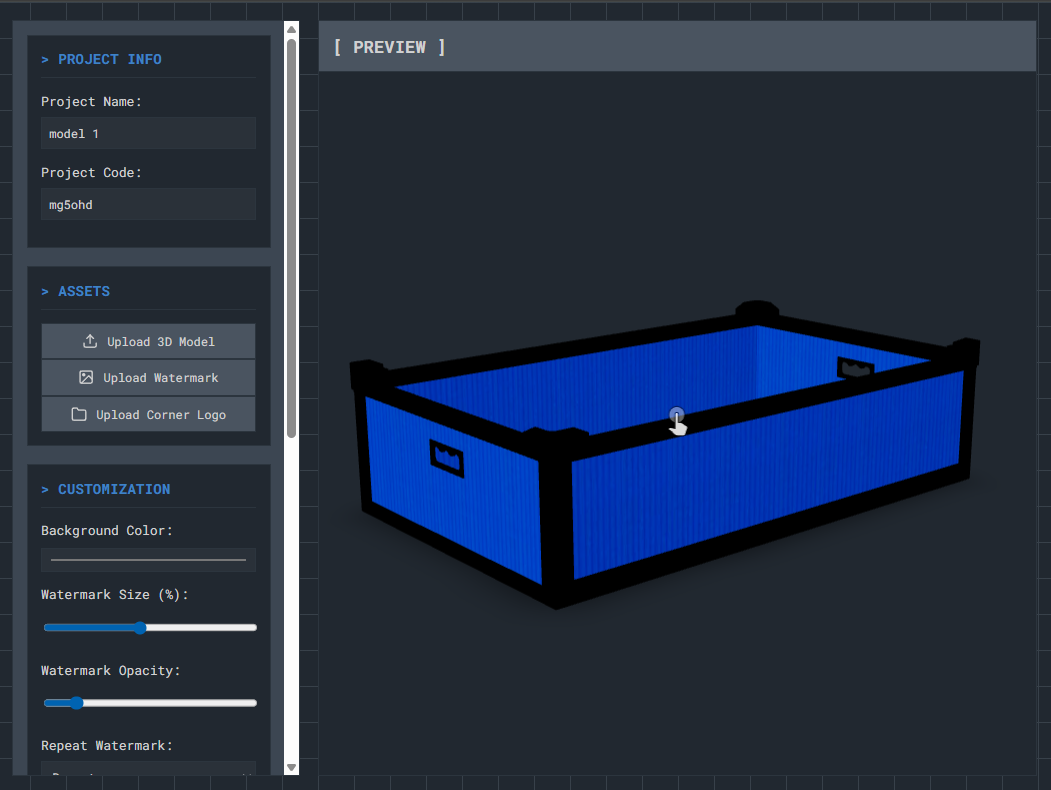
Step 3: Upload Your 3D Model
You are now in the project editor. First, give your project a Project Name. Then, in the ASSETS section, click "Upload 3D Model" to select your file. Once uploaded, your model will appear in the preview window.
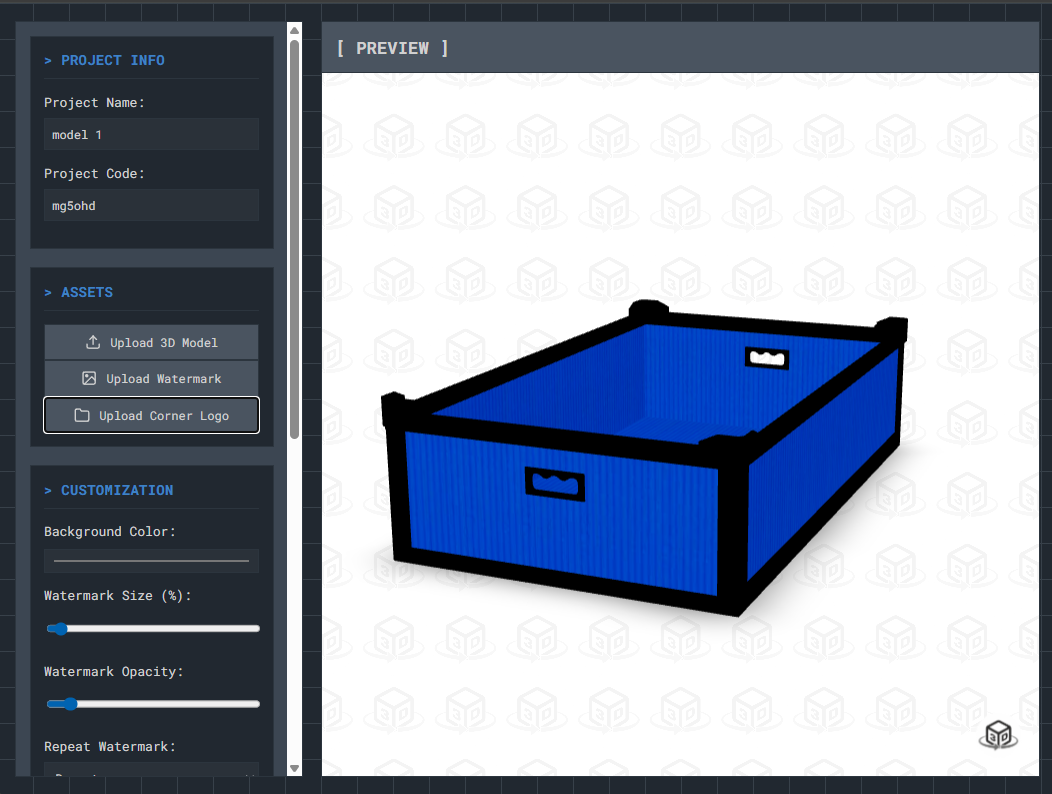
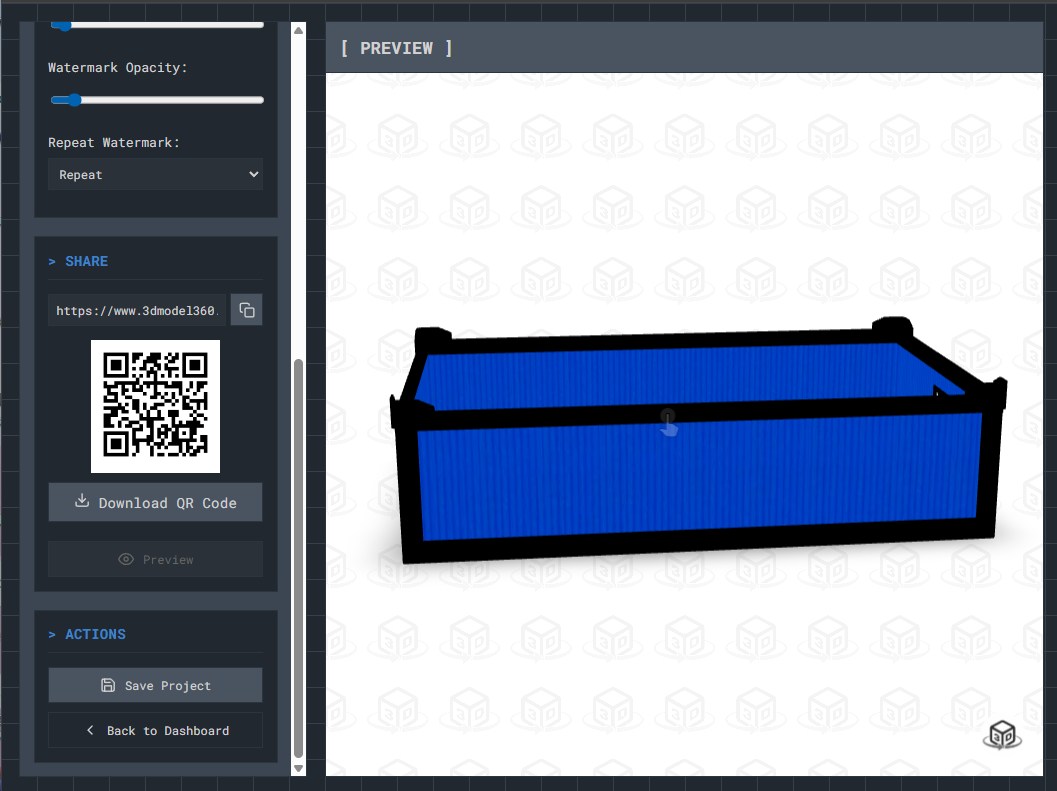
Step 4: Customize the Viewer
Personalize the appearance of your 3D viewer using the options in the [ CUSTOMIZATION ] section. You can upload a Watermark or a Corner Logo, and adjust their size and opacity.
Step 5: Save and Share Your Project
When you're done, scroll down. Under SHARE, you can find the project link and QR code. Most importantly, under ACTIONS, click "Save Project" to save your work.
Step 6: View Your Final Project
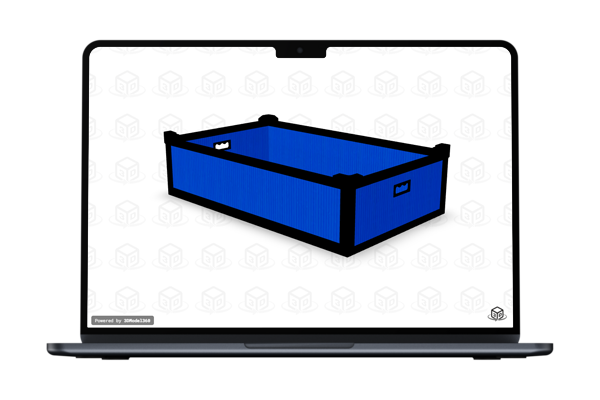
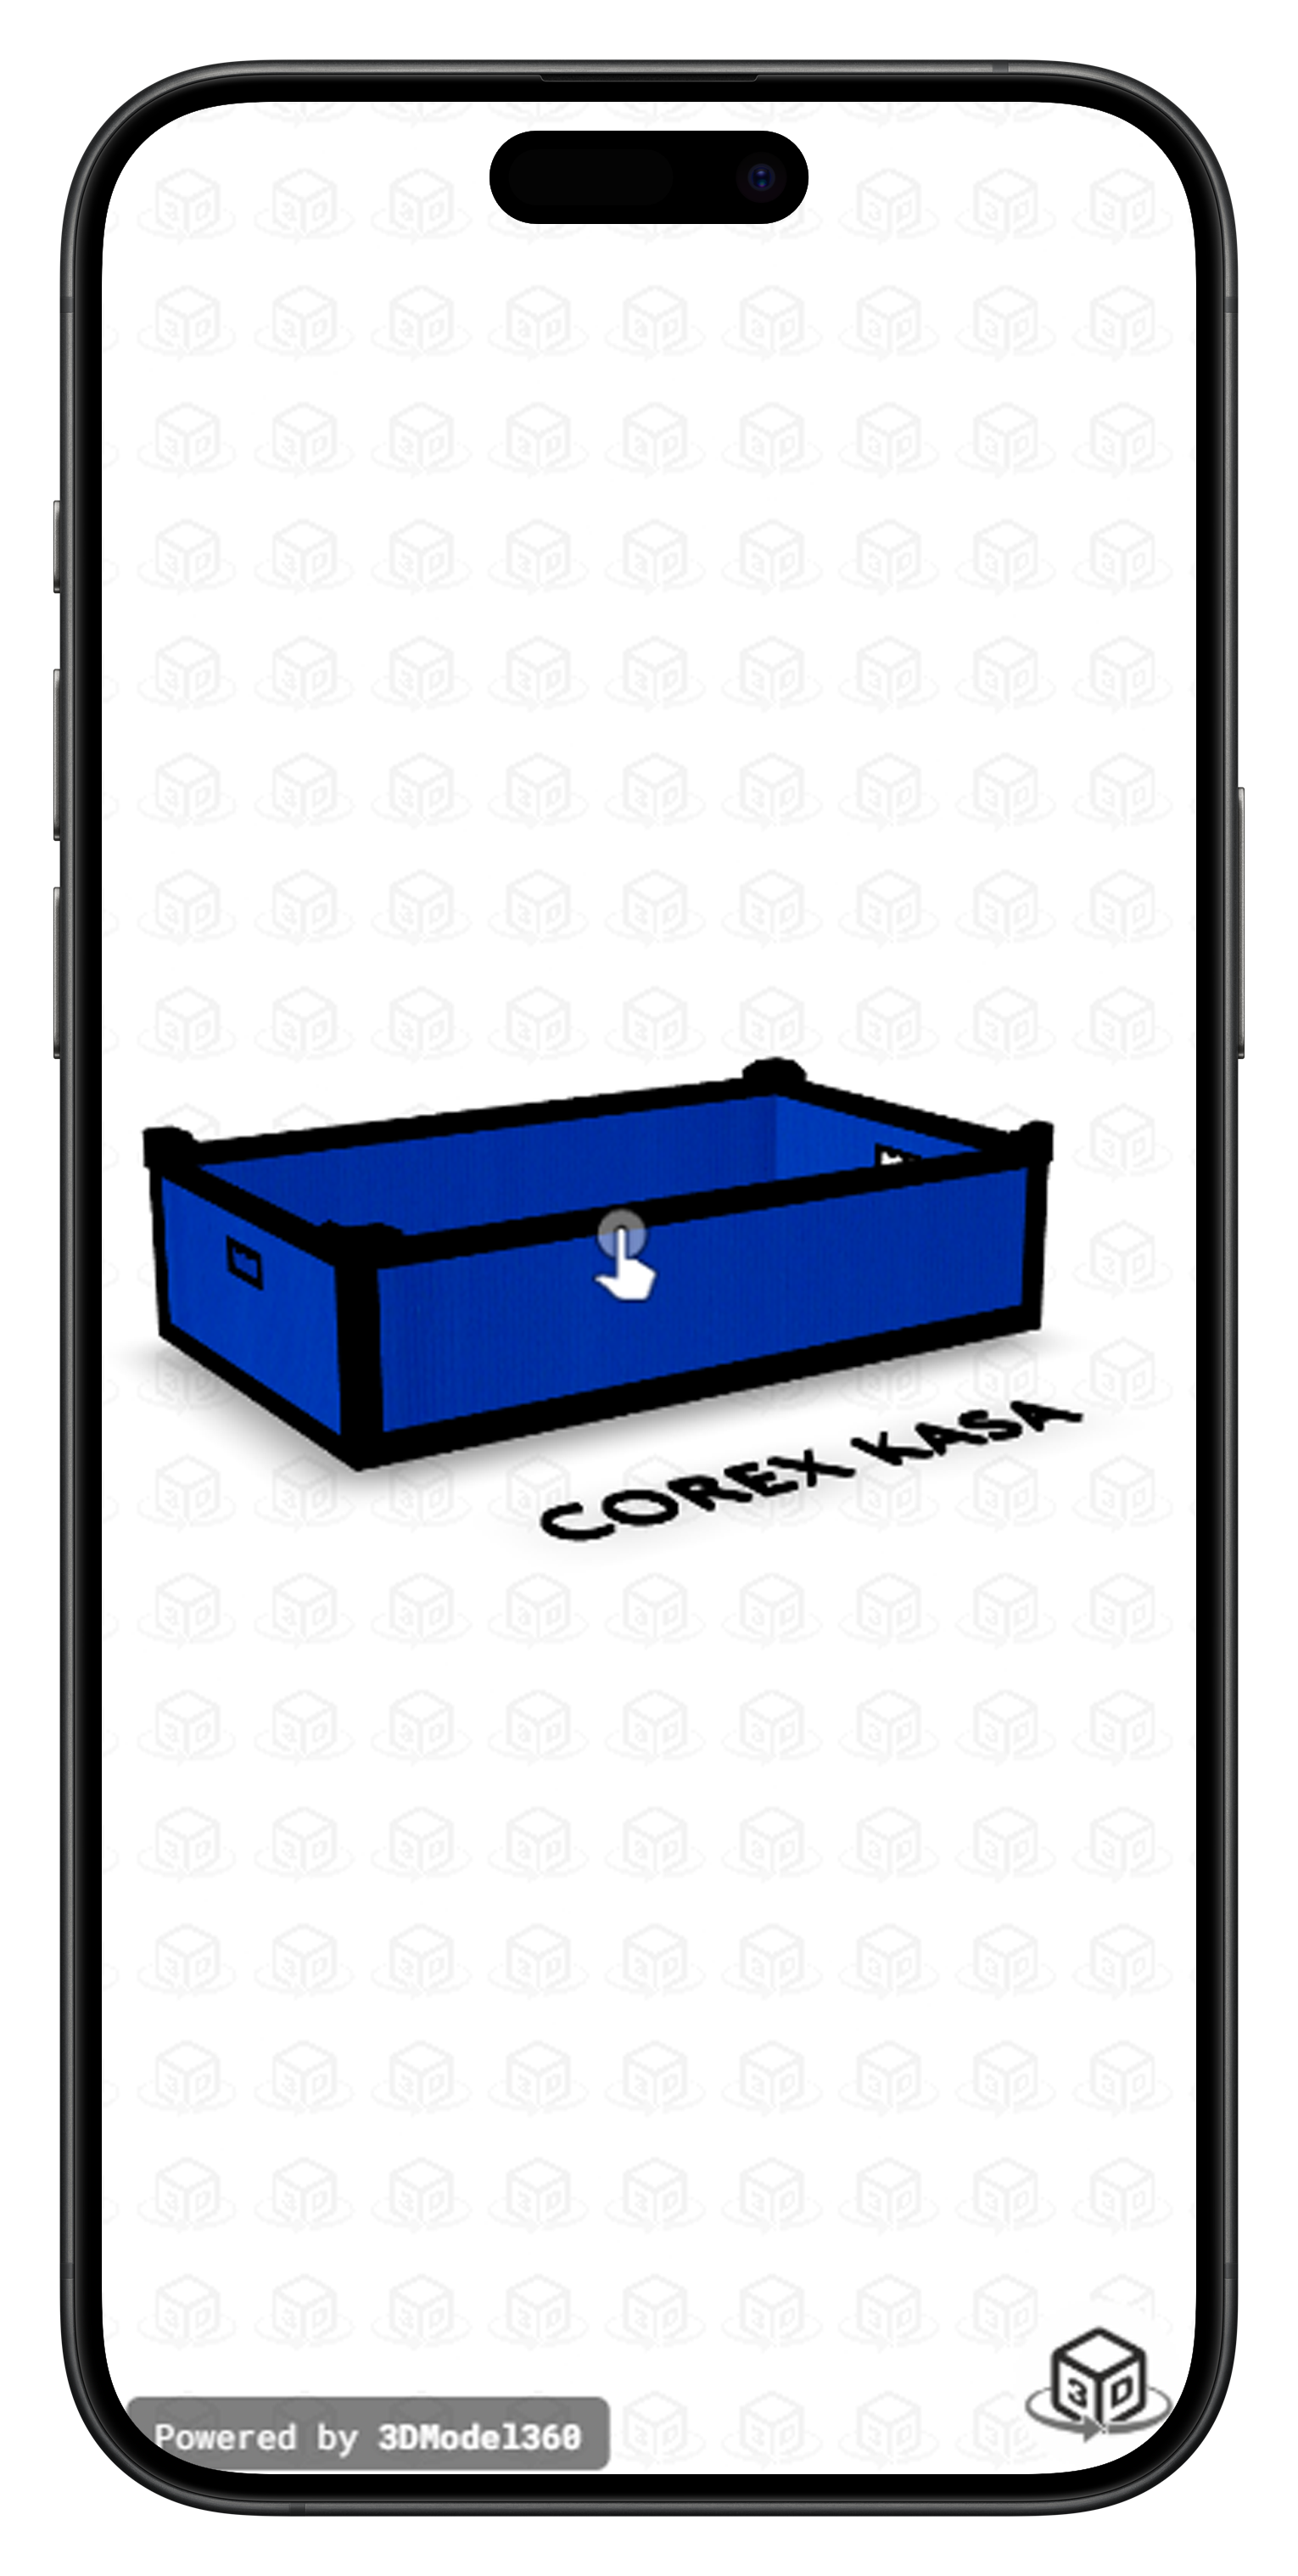
After saving, your project will appear on your dashboard. Anyone with the link will see a clean, public version of your model viewer, which is fully responsive.
Desktop View
Mobile View
Video Tutorial
If you prefer, you can watch the complete process in this video tutorial.